Below the slideshow are my step-by-step instructions for dyeing your own cotton t-shirt yarn. Following the dyeing instructions are my step-by-step instructions for turning your dyed fabric (or undyed if you so choose) into yarn. Please email me if you have any questions and share your creations with me also!
DYEING COTTON T-SHIRTS TO MAKE YOUR OWN YARN
Materials Needed:
-white cotton t-shirt with seamless body (from underarms to hem)
-5 quart pot (or larger)
-hot tap water
-50 tea bags
-large bowl
-cold tap water
-white vinegar
-washer
-dryer
Instructions:
(1) Remove the paper tags, if any, from all 50 tea bags. You can keep the strings on the bags, or cut them off if you prefer; just be careful not to cut open the tea bags. Loose tea will make a mess in your pot!
(2) Fill the pot with about 3.5 quarts of hot tap water and add all 50 tea bags.
(3) Cover your pot and bring the water and tea bags to a boil. Remove cover and let the tea bags boil for about 5 minutes. Turn off the heat and let your tea bags steep in the pot, uncovered, for 15 minutes.
(4) You will only be using the seamless body of your t-shirt. Lay your shirt flat and cut off the top portion of the shirt, from its neck to just below the sleeves. Then cut off the bottom hem. This should leave you with a seamless tube. (You can choose to dye the entire shirt and cut off these parts later, but it may take longer to dye and not fit as well into the pot since you’d be dyeing a larger amount of fabric.)
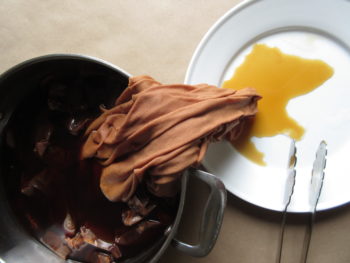
(5) Wet your shirt/tube with hot tap water. Squeeze out excess water but leave the shirt damp and put it into the pot with the tea bags.
Note: if you want your resulting fabric to have some variation in color, leave the tea bags in while the cotton steeps; the parts that touch the tea bags will become darker than the parts that are just sitting in the tea water. If you want your fabric to be uniform in color, remove the tea bags and just let the cotton steep in the tea water.
(6) Let the fabric steep for 1 hour. Then drain the excess water from the fabric and put it into a cold water bath with 1 tablespoon of white vinegar for 10 minutes.
(7) Rinse your fabric until the water runs clear. Squeeze out as much water as possible and machine dry on low until the fabric is dry. (The amount of time it takes will depend upon how damp your fabric is.) Alternatively you can launder the fabric first before drying it if you want to get rid of the tea smell, but be warned that the color may fade if you launder it before drying it (drying first helps to set the color).
(8) After your fabric is dry, lightly machine wash it for 30 minutes in cold water with a small amount of detergent. Then dry the fabric again and get ready to cut it into strips to make your yarn.
MAKING YOUR OWN COTTON T-SHIRT YARN
Materials Needed:
-old cotton t-shirt with a seamless body (from underarms to hem)
-ruler or measuring tape
-sharp scissors
Optional Materials:
-15mm template to help ensure strips are similar widths
Notes about making your own cotton t-shirt yarn:
The cotton t-shirts I used to make yarn had uncut fabric that was 21.75” wide (the width of the shirt) and a seamless body that measured 17” from just under their sleeves to their bottoms (with the hems cut off). I was able to create 29 strips, each approximately 15mm wide.
The balls of t-shirt yarn I made with these shirts had starting weights of 109g (3.8oz) for the white yarn, and 112g (3.9oz) for the dyed yarn.
The t-shirt yarn that you make will depend on the size and thickness of the shirt you use. I am providing information about the t-shirts I used and their resulting yarn for reference only.
Instructions:
**Please read through each step before you begin and use the accompanying photos as guides to make sure you understand the process fully and don’t make unnecessary mistakes!
(1) You will only be using the seamless body of your t-shirt to make the yarn. So first you need to get rid of any part of the shirt with seams. Lay the shirt flat on a hard surface, line up the hem, and smooth out the rest of the shirt. You want to make sure that you cut somewhat evenly through both layers (front and back) of the flat shirt.
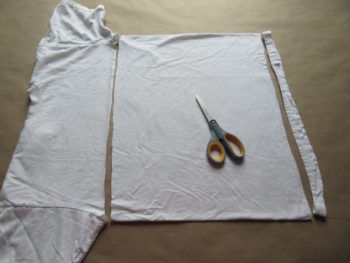
Steps 1 and 2
(2) With sharp scissors so you get a good, clean cut, cut off the top portion of the shirt, from its neck to just below the sleeves. Then cut off the bottom hem. This should leave you with a seamless tube.
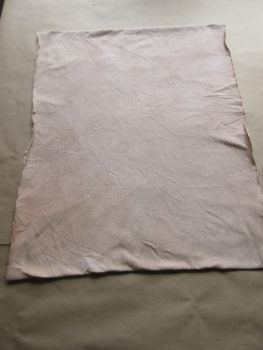
Step 3
(3) Orient your tube with its openings on the left and right; the top and bottom will be continuous fabric that is two layers thick.
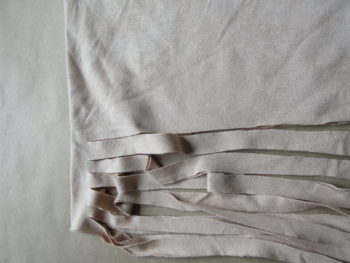
(4) Again with sharp scissors, start cutting your tube into approximately 15mm wide strips, starting at the left side opening, and moving from bottom towards the top. DO NOT CUT ALL THE WAY TO THE TOP THOUGH! Start at the bottom and cut upwards LEAVING 1” UNCUT at the top all the way across your tube.
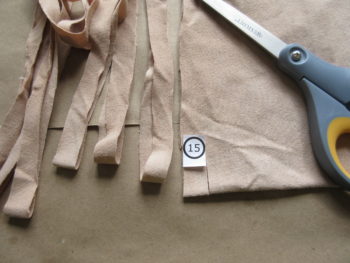
Step 4
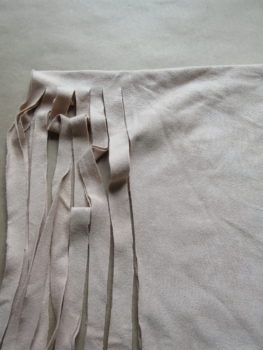
Steps 4 and 5–Note the 1″ at the top is left uncut
**Go slowly and make sure you’re cutting evenly through both layers of fabric. This is why you may want to create and use a 15mm wide template; you can move the template up the fabric as you cut it to make sure your strips near the middle and at the top continue to be 15mm wide.
(5) Continue cutting strips, from the bottom to 1” below the top, all the way across the tube from left to right until you reach the tube’s end on the far right side.
Steps 6 and 7
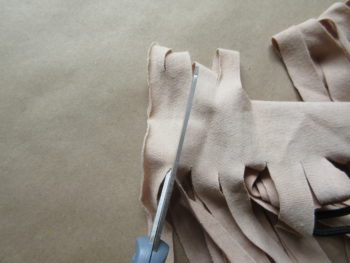
(6) You are now going to create one continuous strip by making diagonal cuts at the top where you left the tube uncut. Reorient your tube and spread out the uncut portion in front of you as flatly as you can. You want to be able to see the strips on both sides of the uncut portion. Since you did not cut the topmost 1” of your tube, you should have approximately 2” uncut when you reorient your tube.
Step 7
(7) Use your scissors to cut diagonally from the edge of the first strip you made across to the edge of the second strip. This sounds odd at first, but if you look closely at the accompanying photo for this step, it will become clear and make sense. MAKE SURE YOU’RE ONLY CUTTING ALONG THE UNCUT PORTION AND THAT YOU DON’T ACCIDENTALLY CUT ANY OTHER PART OF YOUR STRIPS OR FABRIC. The strips are very loose and can easily move around as you’re cutting, so just be careful.
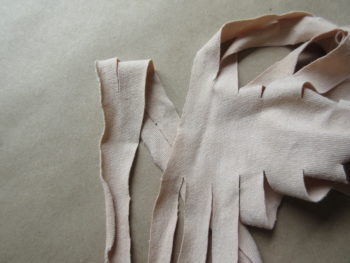
(8) Continue cutting diagonally between strips like this—from the edge of one strip to the opposite edge of the next strip—until you reach the end on the far right.
(9) Now go back to the beginning where you started cutting at the far left of the tube, and make a small diagonal cut from the tube’s left edge to the edge of the first strip. (See photo for Step 7, above. You can see where you need to make the small cut to detach that first strip.) You now will have one continuous strip of fabric.
Steps 9 and 10
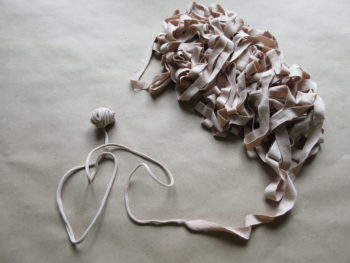
(10) Starting at either end, gently pull a 6” to 8” section of fabric lengthwise as if you’re trying to stretch it and make it longer. The fabric will naturally resist when you’ve stretched it as far as it’s able to be stretched without breaking. It will curl into itself and look like thick string (aka t-shirt yarn!).
(11) Continue gently pulling on your strip of fabric, one section at a time, until you reach the other end. You may want to pause and start wrapping your yarn into a ball to keep it manageable, but you can also wind it all at once when you’ve finished creating your mound of yarn.
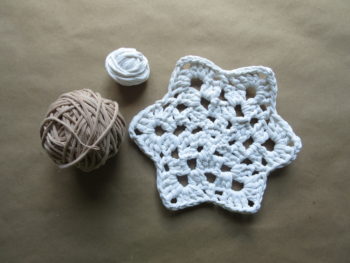
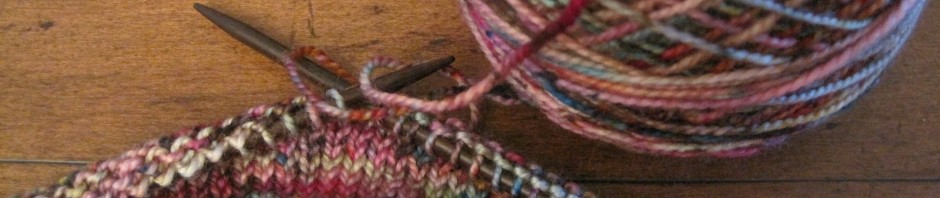
My crocheted snowflake trivet with a small ball of leftover, undyed t-shirt yarn, along with a full ball of t-shirt yarn I dyed using tea bags.
(12) Use your newly-created t-shirt yarn as you would any other chunky cotton yarn. Enjoy!