
My beautiful Radiance Scarf, blocked and ready to wear.
Yesterday I finally got around to blocking my Radiance Scarf. It was so quick and easy, and now my pretty silk scarf is even more attractive. You can really see each of the lovely floral motifs now that they lay flat, and the scarf hangs beautifully.
I chose to steam block since my scarf was made with 100% silk yarn (and is beaded). It worked incredibly well.
I got out and set up my blocking tiles. If you don’t already own blocking tiles, I highly recommend getting some. The set I have consists of 9 textured foam tiles, each 12″ square, with interlocking edges. ((I purchased my set online from KnitPicks for about $25 and am very pleased with them.)) They are particularly great since you can configure them to fit whatever you’re blocking, and the foam surface holds pins in place nicely. Additionally, they’re easy to take apart and store in a small stack. Blocking tiles are all-around fantastic things to own.
Since my scarf was long and skinny, I set out my blocking tiles in a 2 x 4 grid to accommodate that shape. I set my iron on a low heat setting ((For my iron, the suggested setting for silk was level 2.)) and started with medium steam (I set the dial half way between minimum and maximum). After the first motif, I increased the steam to almost maximum but still kept the iron on the low heat setting. More steam worked better–it was easier to open up the motifs with just a few blasts of steam.
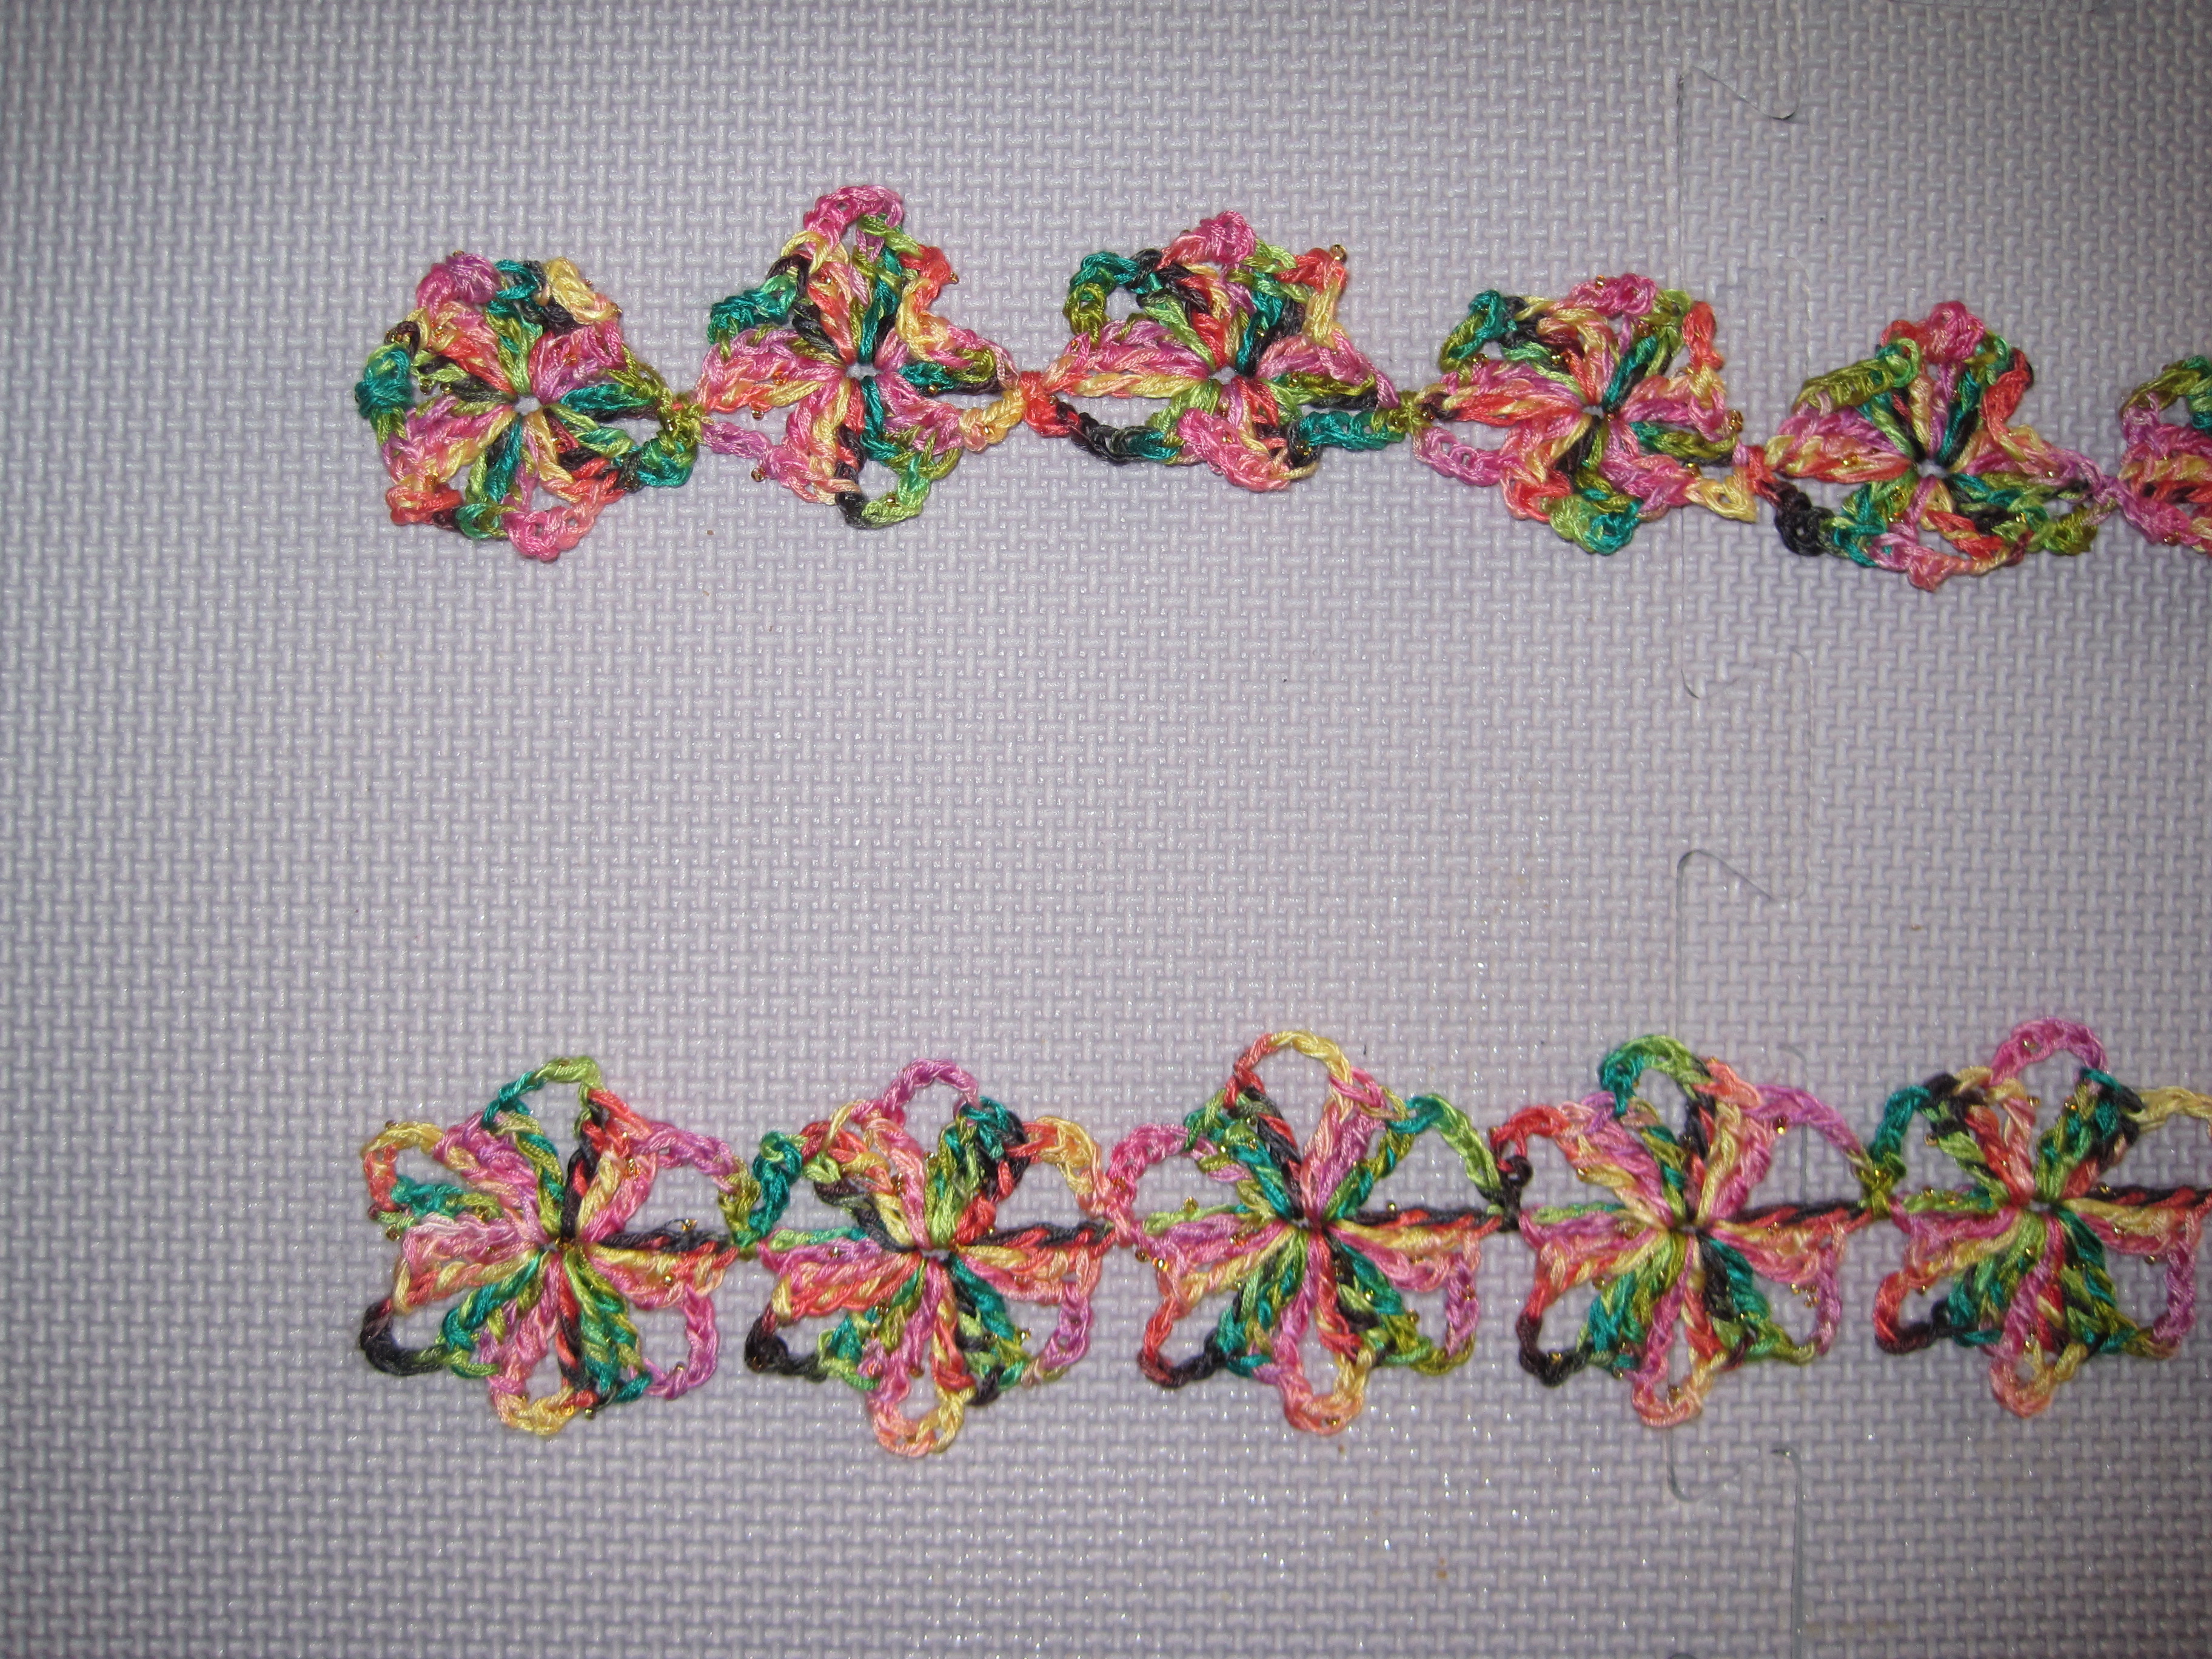
Pre- and post-blocking comparison: the top row of motifs has not been blocked; the bottom row shows what they will look like after blocking.
Holding the iron pretty close–about 1/2″ to 3/4″ above–but never touching the scarf, I steamed a single motif with 3 to 4 bursts of steam then used my fingers to shape the motif by pulling the chained loops outward and spreading them apart. I then used another burst or 2 of steam to set the shape and I readjusted any parts of the motif if needed.
On the very first motif I blocked, after steaming and shaping it, I pinned each of the six chained loops, but that made the loops quite pointy. I wanted rounded loops, like the petals of a flower, so I chose not to use pins for the rest of the scarf. I also didn’t want uniformity for each motif–some variation in a handmade item is nice. I wasn’t looking for “perfect” so I chose to use just my fingers for shaping the rest of my motifs and I am quite happy with the results.
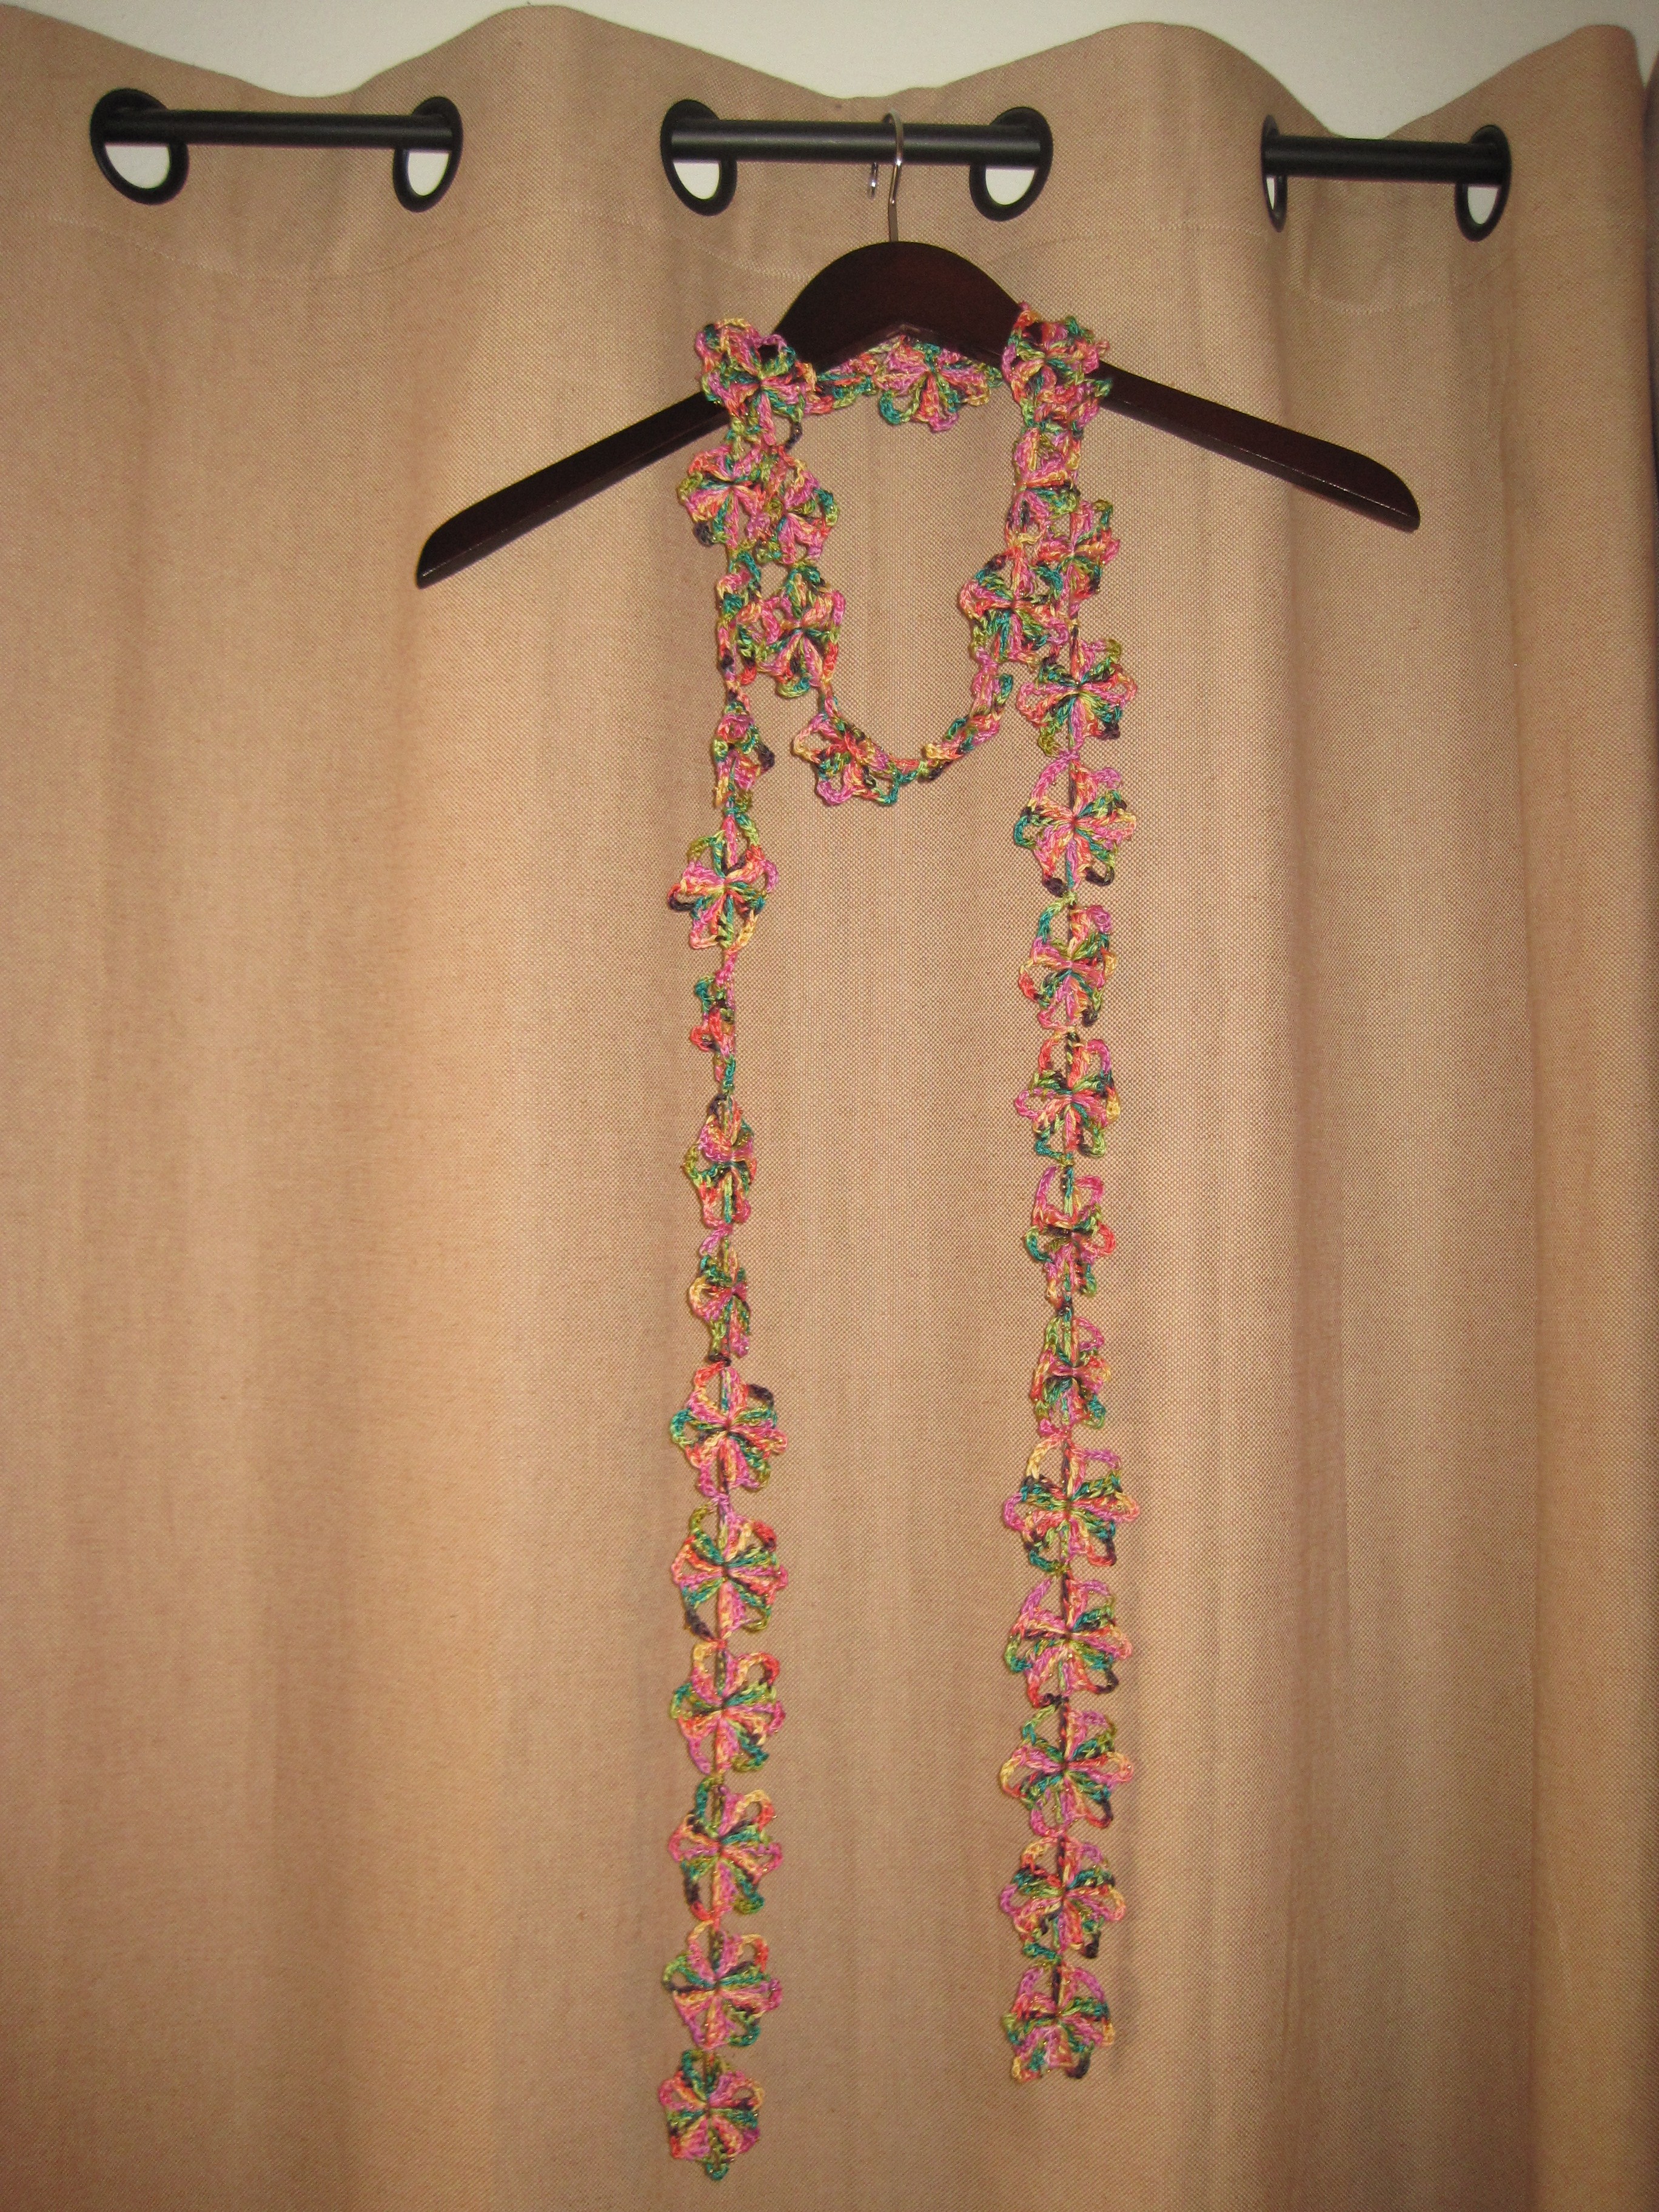
Full view of my blocked and ready-to-enjoy Radiance Scarf.
Blocking my scarf changed the size of each motif (but in a good way!). Before blocking, each motif curled somewhat and was about 2″ to 2.25″ in diameter, ((The variation is due to how much I pulled on the motif in trying to get it to lay flat so I could measure it. Also, each motif is a little different. Since I’m not as good a crocheter as knitter, my tension is not consistent and some of the chained loops are “loopier.” So the pre-blocking measurements are dependent upon how and where I measured.)) and the overall scarf was 80″ in length. After blocking, each motif laid flat was really opened up. The post-blocking diameter for each motif is about 2.5″ and the scarf is approximately 91″ long.