Knitted Napkin Rings–A Sampler of Sorts, Part 2

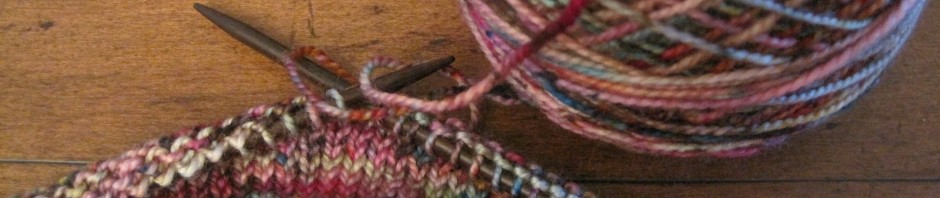
Continuing my series of posts on the knitted napkin rings I designed, here are the next two patterns of the sampler set–Modified Roman Stitch Napkin Ring and Modified Seed Stitch Napkin Ring. ((I call these two patterns “modified” because I altered the original patterns to fit my napkin rings. Download the patterns for details.))

Modified Roman Stitch Napkin Ring

While the Modified Roman Stitch Napkin Ring is the third in the series, it would be a great first project if you’ve never used double-pointed needles before—the project itself is small ((There are not many stitches, both in number per round and total rounds.)) and quick, ((Even if you’ve never used double-pointed needles before, you can knit this napkin ring in a few hours, which will bring a great feeling of accomplishment!)) and the pattern is very easy (mostly just knitting, with some alternating knits and purls).

Modified Stripe Seed Stitch Napkin Ring

Another great aspect of these patterns is that gauge is not critical.  The stated gauge will produce a knitted tube that fits around the inserts I used, ((As noted in my previous posts, I used 44 mm diameter plastic inserts which my husband made for me on his 3D printer. If you’re interested in using similar inserts, email me for more information.)) with the finished napkin ring being about 1.5” high and 7.25” around.  But if you don’t want to use inserts and don’t care if your napkin rings are exactly the size of mine, gauge doesn’t really matter. ((If you use size 4 needles and DK-weight yarn, you’re going to end up with something napkin ring-like. Yours may be a little smaller or larger because of your gauge, but its not like there’s a standard requirement for napkin rings; they just need to fit around your intended napkins.))

Check back in the coming days for the last two patterns of the sampler set and for detailed instructions, with photos, to help you finish your napkin rings.

Download the next two sampler napkin ring patterns here:

Posted in Knitting | Tagged , , , , , , , , , , | 1 Comment

My So-Called “Braided Cable” is Actually a Reverse Plait Cable

I was looking through a pattern library ((It was Barbara Walker’s first treasury of knitting patterns.)) yesterday for inspiration ((I’m in the process of designing some Mother’s Day gifts. I’ll write about them and upload the patterns as soon as they’re finished.)) and discovered that what I termed a “braided cable” for my napkin ring design is actually called a “reverse plait cable.”  It is also sometimes known as “branch cable.”  So, to avoid any confusion and for the sake of accuracy, I’m going to change ((Or more accurately, I’m going to “correct” it. 🙂 )) the name of my napkin ring pattern to “Reverse Plait Cable Napkin Ring.”

Introducing: the Newly-Renamed Reverse Plait Cable Napkin Ring. Ta dah!

My inspiration for the cabled napkin ring was a pattern I’d seen that had double intertwining cables (with four ribs crossing over each other) running through it.  That pattern ((Which was in Vogue Knitting’s Holiday 2008 issue.)) was named “braid” so that’s what I called mine even though I modified it to be only one intertwining cable (of two ribs that crossed over each other).

Of course when progressing through the pattern library I also saw the true Braid Cable, which has three ribs that cross over one another, just like a real braid.  When I saw that, I had a “duh” moment–of course my two-ribbed cable shouldn’t be called braided.  And so it shall be corrected! ((And in turn hopefully my knitting karma will be restored. (Is there knitting karma?) I did not have a good designing day yesterday. Could my knitting ignorance and naming faux pas have been to blame? Geez, I hope so. Please, oh please, let me make some progress today on those Mother’s Day designs.))

Download the Reverse Plait Cable Napkin Ring Pattern here:

Posted in Knitting | Tagged , , , , , | Comments Off on My So-Called “Braided Cable” is Actually a Reverse Plait Cable

Napkin Ring Suggestions & Finishing Alternatives

Here are my suggestions for making and finishing some of the knitted napkin rings if you don’t want to use plastic inserts.

Today I’m only addressing four of the six patterns ((Although you’ll notice that my suggestions for each are very similar.)) from the sampler set I designed.  I will update this post with suggestions for the other two patterns in the coming weeks, so please check back.

For the Seed Stitch Napkin Ring

The beginning five rounds and ending five rounds (in Stockinette stitch) form the napkin ring’s interior.  If you don’t want to use inserts, you may eliminate these rounds and just work the Seed stitch rounds (Rounds 6 through 18).

However, if you eliminate those rounds, consider which cast on you’ll use so you get a nice edge and one that isn’t too loose (and curls) or too tight (and puckers).  I chose to use the long-tail cast on because it results in a nice edge with good balance between tautness and give.  For the long-tail method, leave yourself a 23” tail when making your slipknot.

Alternatively you can still knit those beginning and ending rounds in Stockinette stitch and sew the cast-on and bound-off edges together as the pattern instructs, just without using the insert.  This would result in a double-thick napkin ring with a nicely finished interior.

For the Reverse Plait Cable Napkin Ring (formerly (mis)named Braided Cable Napkin Ring)

The beginning five stitches and ending five stitches (in Reverse Stockinette stitch) form the napkin ring’s interior.  If you don’t want to use inserts, you may eliminate these stitches and just work the braided cable.  However, I’d suggest keeping two edge stitches in Reverse Stockinette stitch on each side so you can see the entire braided cable when finished (the stitches at the very edges will curl, but the cabled strip will lay flat).

Alternatively you can still knit those beginning and ending stitches in Reverse Stockinette stitch and sew the sides together as the pattern instructs, just without using the insert.  This would result in a double-thick napkin ring with a nicely finished interior.

For the Modified Roman Stitch Napkin Ring & Modified Stripe Seed Stitch Napkin Ring

The beginning six rounds and ending five rounds (in Stockinette stitch) form the napkin ring’s interior.  If you don’t want to use inserts, you may eliminate these rounds and just work Rounds 7 through 18 of the pattern.

However, if you eliminate those rounds, consider which cast on you’ll use so you get a nice edge and one that isn’t too loose (and curls) or too tight (and puckers).  I chose to use the long-tail cast on because it results in a nice edge with good balance between tautness and give.  For the long-tail method, leave yourself a 23” tail when making your slipknot.

Alternatively you can still knit those beginning and ending rounds in Stockinette stitch and sew the cast-on and bound-off edges together as the pattern instructs, just without using the insert.  This would result in a double-thick napkin ring with a nicely finished interior.

Posted in Knitting | Tagged , , , , , | Comments Off on Napkin Ring Suggestions & Finishing Alternatives